Microgreens make a nutritious addition to salads and sandwiches and can elevate a humble dish as a beautiful and tasty garnish. These tiny plants are simply the young seedlings of the plants we often grow for greens—usually lettuces, cooking greens, and herbs. They’re sold at farmers’ markets and well-stocked grocery stores like Trader Joe’s and Whole Foods, but they are also easy to grow on a windowsill and offer quick reward with little investment in time, space, and resources.
To grow your own microgreens, you just need a spot that gets four to six hours of direct sunlight, preferably in a south-facing window, some basic supplies, and seeds. You can start with a seed packet of mesclun or salad mix containing greens with a variety of flavors and textures and similar germination requirements. Or create your own mix: Beets, kale, and radishes, for example, all work well and have similar sprouting times.
Supplies- 11- by 21-inch germination tray with lid (available at garden centers) or 2 or 3 recycled lettuce containers with drainage holes poked into the bottom
- 1 small bag potting soil
- 2 or 3 packets mesclun mix or ½ ounce bulk seed
- Sharp scissors
- Spray bottle filled with water
Generously sprinkle the potting soil with water and gently toss it with your hands. Then place 2 or 3 inches of soil in the growing container. Tamp the container down to settle and even the soil. With your hand, very gently press the top of the soil to create a stable surface for your seeds. Do not compact it too much.
To sow, you can then either create small rows an inch apart with your finger along the length of the container and drop the seeds in or simply sprinkle the seeds evenly over the surface. Both methods work equally well. You can sow as densely or sparsely as you see fit. The denser the planting, the less leggy the seedlings will be. Since you are harvesting when the plants are young, there's no need to accommodate full-sized plants.
After you sow the seeds, sprinkle about a quarter inch of soil over the top and mist with a spray bottle to moisten. Position the lid and place the container on a sunny, warm windowsill. Check once a day to make sure the soil has not fully dried out, and mist when necessary.
Once your greens sprout, remove the lid and keep them misted in a sunny location with good air circulation (to avoid surface mold). After 5 to 8 days, depending on the seed variety, they will be ready to harvest! Snip the tiny plants off with scissors just above the soil immediately before using them to ensure that they are at their most flavorful and nourishing.
Recipe: Buttermilk Beets with Microgreen Garnish
Yield: 4 servings
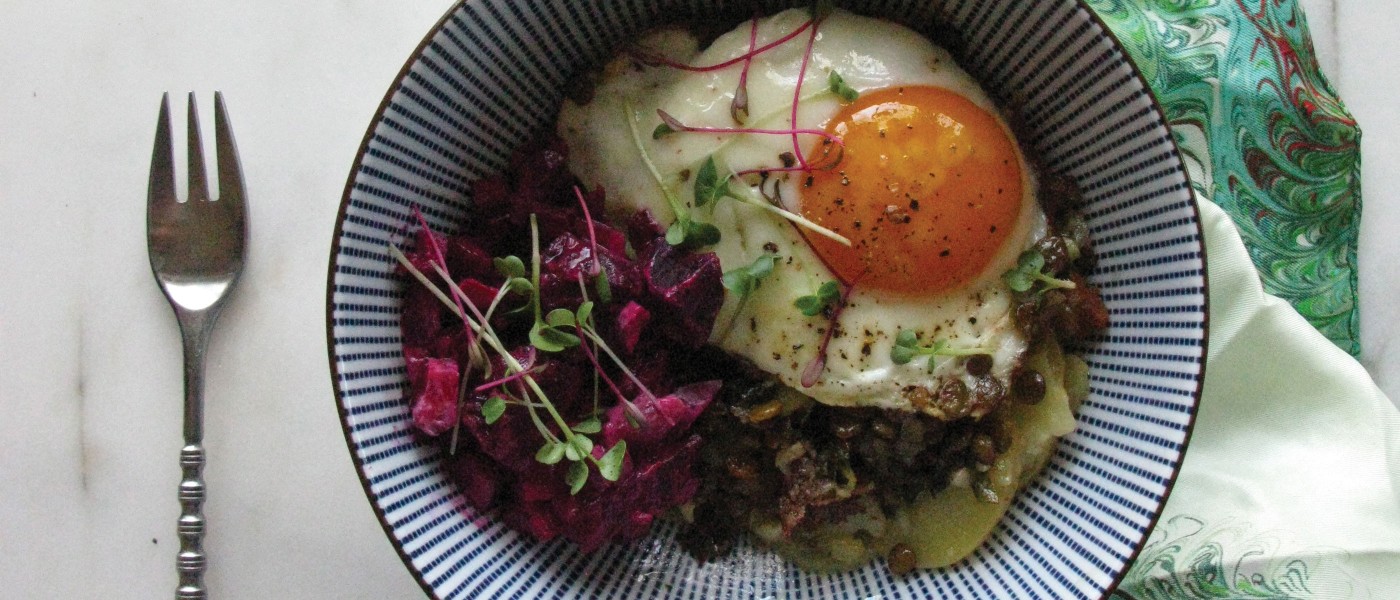
This simple recipe is a delicious creamy side for roasted meats, or, as seen here, with lentils and a rich fried duck egg. It includes only a few ingredients and can be made with almost any freshly chopped herbs. I prefer cilantro, but parsley, chives, or even a little mint would work well to brighten the flavor of the beets and tangy buttermilk. Top with a generous sprinkling of microgreens to impress your guests or make your desk lunch feel a little fancy.
Ingredients- 8 whole beets, small to medium size
- ½ cup whole buttermilk
- 1/8 teaspoon sriracha sauce (or to taste)
- 1 tablespoon chopped herbs
- Generous pinch of salt
Preheat oven to 425°F. Trim away leafy tops from the beets and reserve for another use. Wash the beetroot and trim any long, thin tails. Place in an ovenproof glass or ceramic dish and roast for one hour or until the skins start to wrinkle and the beets are tender to a fork. Remove from the oven and cool.
Once the beets are cool enough to handle, trim the root tops and slip the skins off with a knife. Slice them into rounds or chop into 1-inch pieces and place in a large bowl. In a separate small bowl, whisk together the buttermilk, sriracha, herbs, and salt. Toss with the beets and serve with microgreens. This salad will keep well for several days if covered in the refrigerator.
The Eat Local series features seasonal, locally available ingredients and recipes. It was the recipient of a 2016 Silver Medal for Blog Writing from the Garden Writers Association.


