Few gardeners are lucky enough to possess a moist spot, much less a true bog. I garden in Minneapolis on a dry terrace adjacent to the Mississippi River, in silty loam above limestone bedrock. For an ardent plant collector such as myself, lack of moist soil is a cruel fate. I love turtleheads, sedges, skunk cabbage and iris, plants of low woods and wet meadows which demand continuous moisture to thrive. In my dry, silty soil, it seemed impossible to even think of growing them. Impossible, that is, until I thought of creating an artificial bog garden.
Natural bogs form in glacial lake beds and shallow depressions over hundreds of years. My challenge was to create a consistently moist soil environment for plants on a flat, well-drainedriver terrace. Employing the same technology available to water gardeners who build artificial ponds, I used a plastic-lined trench. But instead of filling the liner with water, I filled it with soil. Unlike a true marsh, which has open water, my bog provides a haven for plants that like wet feet; there is no standing water.
Keeping the soil moist was not the only consideration in the making of my bog. The relationship of the new bog garden to the overall landscape design was also paramount—I didn't want the bog garden to look like a botanical freak show. My garden is laid out formally. A rectangular lawn and terrace form a long axis, flanked on both sides by eight-foot-deep beds. The bog garden had to complement and maintain the integrity of this design framework, forming an exuberant planting bed with lots of relaxed and tumbling plants to mirror the one on the opposite side of the lawn. I decided to run the bog garden for 25 feet along the entire length of the lawn. On either end, it blends imperceptibly into the existing beds, creating a visually unified whole. Though the lines of the garden are rectilinear and formal, the overall effect is relaxed and comfortable. The velvety lawn is surrounded on all sides by lush plantings. The bog garden fits in perfectly.
Building a Bog Garden

Once the size and shape of the new bog were designed, the most challenging task was excavating the hole. I decided to make the bog two feet deep. In retrospect, I should have dug down to three, allowing the dictates of the plants to determine the bog's depth rather than my physical stamina. Since small excavations dry out quickly, the larger you make your bog garden, the better. Deeper soil is more accommodating to the root systems of mature plants. In other words, if you are thinking about designing several small bog gardens, you would be better off with one large one at least 2-1/2 feet deep.
Starting at one end, I dug the trench to its full depth as I moved down its length. While digging, I kept the walls sloped outward slightly from the bottom of the trench to keep them from caving in. To protect the lawn, I piled the soil on a tarp. The mountain of soil that grew next to the pit caused quite a stir on the block. Neighbors appeared from all corners to investigate. The 8-foot prairie plants I had used in the front garden had made them suspicious. But when they heard I was building a bog, they thought I had really lost it. Now that the hole is filled and the plants are in place, they can't even tell that the bog is there.
After excavating, I lined the trench by rolling out an 8 mm plastic sheet. The use of a single, unbroken sheet is important because the seams created by using several overlapping sheets will not hold water.
Some drainage is necessary to keep the crowns of the plants (the point where the roots meet the top growth) from rotting. Because I garden in USDA zone 4, where winter temperatures reach -30 degrees F, I was also concerned about the cold. I didn't want water and ice to come into contact with the crowns, so I placed drainage holes around the periphery of the liner, a foot below the soil surface. By duplicating the conditions under which many plants grow in the wild, I ensured that the top of the soil—where the crowns are—remains relatively dry, while the roots are kept moist.

After unrolling the plastic sheet and centering it over the trench, I let it settle in, checking to make sure that the liner fit the excavation's contours. Then, I filled the trench with a mixture of half compost and half excavated soil, packing it down as I went, until it mounded in the center. It is important to fill the entire trench level by level to insure that the liner falls into place evenly along the entire length, and to tamp down the soil as you go.
Some people install perforated pipes in the corners of the bog to expedite watering. The pipe is buried vertically, with the bottom of the pipe extending down to just above the bottom of the liner. The top of the pipe sits 1 to 2 inches above the soil line. There are two ways to do this: The simplest is to use narrow, perforated tubing and run a hose inside of it to water the bog. However, water can run into the bog too quickly, backing up in the tube. The second method requires two perforated pipes. Place a narrow tube within a larger tube at least 10 inches in diameter. Fill the gap between the two with pea gravel. When watering, run your garden hose down the inner tube. This methods enables the water to seep into the soil more gradually. It is particularly useful for controlling the water flow in specialized acidic bog gardens (see "A Bog for Specialized Plants").
I chose not to use pipes at all. My house has no gutters and so the bog, which runs the length of one side of the structure, collects all the water that runs off the roof each time it rains.
After adding the soil, I filled the new bog garden with tapwater and let it sit until the soil settled. I recommend waiting at least a month before planting, keeping the soil wet at all times. If you cannot wait a month—and few of us have such patience—wait at least a week. Smooth out the lumps in the the soil surface, keeping the mound in the center before you plant. Fill in with additional soil if necessary to keep a consistent level. Cut the plastic liner flush with the soil and you will never notice the seam between bog and lawn.
Bog Plants

Many of the plants that grow in the wet, peaty soils of bogs and other wetlands are beautiful garden plants for either sun or shade. Locate your bog according to which plants you wish to grow and how they fit in with the rest of your garden.
In nature, a bog contains plants that are uniquely adapted to wet, acidic soils—acidic because little or no water flows through the bog and so no acids are leached away. In an artificial bog, you can either grow these specialized plants or a wide variety of perennials, bulbs and shrubs which require constantly moist soils, such as bog rosemary, turtlehead and blue flag iris. I chose the latter approach for my garden. Building a specialized bog garden is discussed on the next page. Before buying plants, decide on which kinds you wish to grow, either garden plants or those suited to acid conditions.
The beauty of bog plants is not just in their flowers, but also in their foliage. I love their bold showy leaves—the arrowhead shapes, the umbrellas and the swords—which is why I love bog gardens. These shapes are even more striking when contrasted with delicate sedges and ferns, which also thrive in moist soil.
Maintenance
The most important maintenance job for an artificial bog garden is watering. Never let the soil dry out. Dry soil means sure death for moisture-loving plants. Mulch the garden with pine straw or oak leaves in the winter to help protect delicate plants. Leave the mulch in place, allowing it to rot into the soil. Top dressing with rich compost will also enrich the soil, keeping its level constant as the soil settles. As with any garden, remove weed seedlings before they become a problem. Weeds will be few as many of them do not thrive in wet soil. Depending on the location of your garden, tree seedlings may be a nuisance.
Other Ways to Build a Bog
Bog gardens can be difficult to work into the landscape. If you have a pool or pond, place the bog garden next to it, so that the bog blends harmoniously into the landscape. If you connect the bog and the pool with a length of pipe to allow the water to flow freely, the pond can provide water for the bog. This will also keep water levels in both enclosures constant.
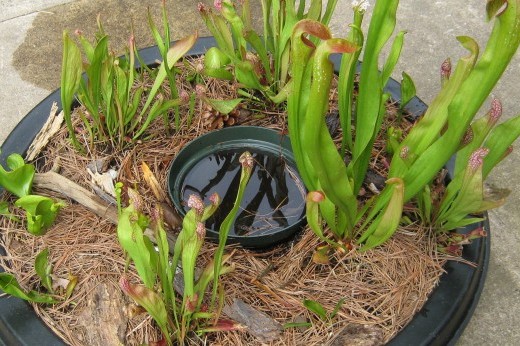
If you don't have room for an in-ground bog, you can still have a bog garden. Try using an old whiskey barrel or other container that holds water. I have seen kids' wading pools, utility sinks and even old bathtubs used to make bog gardens. Your imagination is the limit. With a little ingenuity, anyone can have an artificial bog garden. So what are you waiting for?
Bog for Specialized Plants
Growing plants native to sterile acid bogs requires a different approach from the one I took in my garden. The environment of a true bog is unlike a low, wet woodland or meadow. A bog forms slowly in a glacial lake bed with the help of specialized mosses called sphagnum that grow inward from the edges of the lake. As they grow, the lower portions of their stems die but remain attached as the upper stems branch and spread, creating an interwoven mat.
At first the moss floats on the surface of the water. But as the mat grows and decays, it deposits peat on the lake bottom. As the sphagnum spreads outward, the floating mat becomes thick enough for other plants to take root and grow. Eventually, the sphagnum covers the entire lake, and the floating mat of vegetation is dense enough to support flowers, shrubs and even trees.
This kind of bog is called a quaking bog. Walking on it is like walking on a squishy waterbed. The ground trembles or quakes. To re-create this environment in your yard, you need to provide a sterile substrate on which the plants can grow. Clean, medium-coarse sand and peat moss are the best choices. Dig a trench as described in the accompanying chapter. Since most specialized bog plants have sparse root systems, two feet is generally deep enough. I recommend installing perforated pipe in at least two corners of the bog as you may be adding distilled water or rainwater collected elsewhere. A pipe 2 to 4 inches in diameter is ideal. For larger bogs, use the double-pipe system described above.
Fill the excavation with a 50/50 mixture of sphagnum and sand. A living layer of sphagnum at the top of the bog is desirable but may be hard to come by. Carolina Biological Supply Company is a good source. You can reach them at 2700 York Road, Burlington, N.C. 27215; (800) 334-5551.
It is imperative that you let the bog settle for at least a month before planting. The pH of the sand and sphagnum mix and the water need to come into balance before the plants are added. The additional time also allows the soil to settle. If it settles too much after the plants are established, it may bend or break their new roots.
Before planting, wash all the soil from the roots of the new plants to avoid introducing soil-borne microorganisms and worms. If you use live moss, add it after the other plants are in place. The moss is often slow to establish.
Use only rainwater or distilled water in the bog. Tapwater contains minerals and chlorine harmful to bog plants. It is also neutral to alkaline in pH, and bog plants need a highly acidic soil. As with all bogs, consistent water is essential. Bogs are naturally low in nutrients, so do not add fertilizer.
Because it requires so much diligent attention, a specialized bog is not for everyone. Do not waste time and doom plants to a slow death if you are unwilling to manage a true bog garden properly.
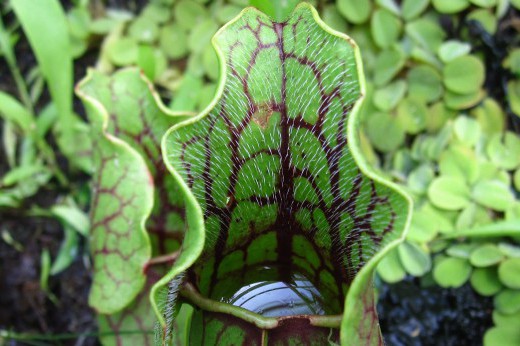
Many bog plants, such as pitcher plants, are becoming rare in the wild. If you choose to plant them, purchase them only from reputable dealers who propagate their own plants. Make sure you do not buy wild-collected specimens. Remember that "nursery-grown" does not mean nursery propagated.
A living mulch of sphagnum moss is desirable for an acid bog. Add an additional mulch of pine straw in winter to protect delicate plants, especially in areas where winters are cold and snowfall is erratic. Remove the mulch in the spring to allow the sphagnum to grow.


